Climb Kilimanjaro: A complete guide to the number 1 Peak in Africa

So You Want to Climb Kilimanjaro?
You’ve done it. You’ve stared at a map, looked at a mountain, and said, “Yep, I reckon I could climb that.” And not just any mountain, oh no, you’ve decided to aim straight for the big cheese of Africa: Mount Kilimanjaro. Standing tall at 5,895 metres, Kili isn’t just the highest point on the continent; it’s the highest freestanding mountain in the world. Which basically means it’s not attached to a bigger mountain range, just standing there awkwardly like the overachiever in a class of molehills.
Now before you start announcing your intentions to friends and colleagues, be prepared for the following responses:
- “Isn’t that in Kenya?” (It’s not. It’s in Tanzania. Geography matters.)
- “Wow, are you doing Everest next?” (Please don’t.)
- “Can you even climb Kilimanjaro? I thought it was just a hike.” (Cue the internal rage.)
Kilimanjaro is deceptive. There are no ropes, no technical climbing, and no ice picks… but don’t let that fool you. This is a serious mountain that has chewed up and spat out many a gym bro who thought leg day was all the prep he needed.
So why do it?
- Because the views are spectacular.
- Because it’s one of the most accessible high altitude hikes in the world.
- Because it’s a challenge worth every drop of sweat, every 5am start, and every awkward conversation with your bowels at 4,800 metres.
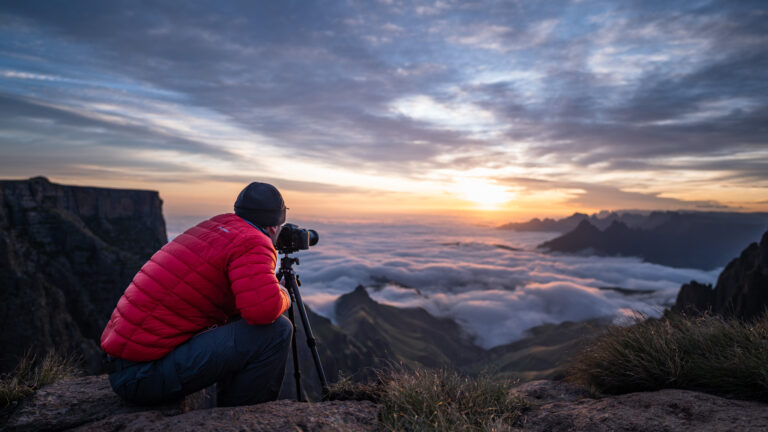
And, most importantly: because standing on the Roof of Africa, watching the sun rise over a sea of clouds, is the kind of life experience you’ll be talking about until you’re old and wrinkly and your grandkids beg you to shut up about it.
This guide is your no fluff, no nonsense, definitely no sugar coating handbook to Climbing Kilimanjaro. Expect hard truths, helpful tips, and the occasional inappropriate joke. You’ve been warned.
Let’s get stuck in.


When to Climb Kilimanjaro (And When You’ll Just Get Soaked and Sad)
Here’s the good news: Kilimanjaro is open for business all year round. You could, in theory, wake up in the middle of February or September or even a soggy Tuesday in November and decide to climb Africa’s tallest mountain. Nobody’s going to stop you.
Here’s the bad news: that doesn’t mean it’s a good idea.
Climbing Kilimanjaro is hard enough without adding freezing rain, ankle deep mud, and zero visibility into the mix. If you’re going to endure altitude headaches and questionable toilet situations, you may as well do it with a view.
The Two Best Times to Climb Kilimanjaro
There are two distinct dry seasons that most sane people aim for. These are the windows when the skies are (mostly) clear, the trails are (relatively) dry, and your odds of reaching the summit without developing a hate-hate relationship with your socks are highest.
January to March
This is the quieter of the two climbing windows. The weather is generally stable with occasional snow at the summit, especially in February.
Pros
- Fewer climbers on the trails.
- Clear skies and dramatic summit views.
- Cooler temperatures make for easier trekking conditions.
Cons
- Nights can be bitterly cold, especially above 4,000 metres.
- Some rainfall is possible lower down, especially in late March.
Who it’s for: People who want a slightly quieter experience and aren’t put off by the idea of chilly evenings and frosty tents.
June to October
This is Kilimanjaro’s peak climbing season. The weather is at its most reliable, the views are postcard worthy, and the summit success rate is high due to dry conditions.
Pros
- Long stretches of clear, dry weather.
- Excellent visibility from base to summit.
- Higher foot traffic means well-worn, easy-to-follow trails.
Cons
- It’s busy. Expect queues at the long drops and campsites that feel like tented suburbs.
- The dust on the lower slopes gets kicked up by hundreds of boots.
Who it’s for: First time trekkers, school holiday climbers, and those who want the best odds of a successful, dry summit.
When Not to Climb Kilimanjaro (Unless You Secretly Enjoy Suffering)
April to May – The Long Rainy Season
This is the season of regret. Heavy rain pours down the mountain’s lower slopes, making trails muddy, slippery, and generally unpleasant. Even if you make it to higher altitudes, the damp gear and clouded views will likely sap all your summit motivation.
Why it’s the worst
- Non stop rain, especially in the rainforest zone.
- Poor trail conditions.
- Cold, wet nights with limited views.
- Increased risk of illness, including colds and flu from damp conditions.
Unless you’ve been training for an endurance event in a carwash, give this season a hard pass.
November – The Short Rainy Season
Slightly less wet than April and May, but still more than enough to ruin your socks and morale. There are occasional breaks in the weather, and some routes (like Rongai) stay drier, but overall it’s a gamble.
Why it’s risky
- Unpredictable rainfall.
- Muddy trails and reduced visibility.
- Higher chance of cancellations or delays.
You might get lucky with a dry week. Or you might end up soaked, cold, and trying to dry your underwear over a camp stove.
A Note on Temperature and Conditions
Kilimanjaro is known for its climate zones, five in total, from tropical forest to arctic summit. Even in the dry season, you’ll go from sweating in a T-shirt to wearing every piece of clothing you own. In a single day.
- At lower elevations, temperatures range between 10 and 25°C.
- Above 4,000 metres, the air gets thinner and the cold bites harder.
- At the summit, temperatures can drop to minus 15°C or lower, especially before dawn.
- Wind chill at Uhuru Peak can make your face feel like it’s been slapped by a frozen fish.
In short: even in the best seasons, you need to prepare for hot, cold, dry, and wet… sometimes all within a single morning.
Summary:
- Aim for January to March or June to October.
- Avoid April, May, and November unless you enjoy misery.
- Be prepared for weather mood swings no matter when you go.


Understanding Kilimanjaro’s Seasons (aka Nature’s Mood Swings)
Climbing Kilimanjaro is like dating someone with a personality disorder. One minute it’s warm and pleasant, the next it’s cold, distant, and raining on your snacks. The mountain spans five distinct ecological zones, each with its own weather patterns, terrain, and emotional baggage. You’ll start in humid jungle and end up in a frozen wasteland all in less than a week.
Understanding these zones will help you pack smarter, layer like a pro, and mentally prepare for the fact that your sweat will freeze on your eyelashes at some point.
Zone 1: Cultivation Zone (800 – 1,800m)
Also known as: “The place where bananas grow and everything smells alive.”
This is the lush farmland around the base of the mountain. You’ll drive through it on your way to the trailhead, passing small villages, coffee plantations, and people who look very amused by the sight of tourists in safari hats and brand-new boots.
- Climate: Warm and tropical.
- What to wear: Lightweight hiking clothes. You’ll be sweating before you even start hiking.
- Wildlife: Cows, chickens, and the occasional unimpressed goat.
You’ll probably forget this zone exists by Day 2, but it’s the last time your feet will be truly dry.
Zone 2: Rainforest (1,800 – 2,800m)
Also known as: “The reason your waterproof gear exists.”
This is where your trek officially begins. Think misty trails, dense green foliage, and trees that look like they’re plotting something.
- Climate: Warm, humid, and usually damp.
- What to expect: Muddy trails, constant sweating, and hearing your heart in your ears.
- Wildlife: Colobus monkeys, blue monkeys, bush pigs, and the occasional chameleon.
Pro tip: wear gaiters. Otherwise, your boots will look (and smell) like they’ve just been through a washing machine full of compost.
Zone 3: Heath and Moorland (2,800 – 4,000m)
Also known as: “The Twilight Zone of Weather Confusion.”
The trees disappear, the views open up, and the temperature drops. You’ll find yourself alternating between T-shirt and down jacket faster than you can say “where’s my sunscreen?”
- Climate: Cool and dry, but intense sun during the day.
- What to expect: Big temperature swings. One minute you’re hot, the next you’re shivering.
- Vegetation: Weird and wonderful. Giant groundsels and lobelias make you feel like you’re on another planet.
This is where altitude starts to play games with your head, both physically and emotionally. You may cry because your Snickers bar melted. It’s normal. Sort of.
Zone 4: Alpine Desert (4,000 – 5,000m)
Also known as: “The Moon, but with less oxygen.”
Now things get serious. It’s cold, barren, and windy. The ground crunches with frost in the morning and roasts under the sun by midday.
- Climate: Harsh and dry.
- Conditions: Dusty, desolate, and beautiful in a kind-of-apocalyptic way.
- Temperature: Drops well below freezing at night, despite strong sun during the day.
- What to wear: Layers, windproof jackets, and a strong sense of humour.
Breathing gets tougher here, and every incline feels like a betrayal. This is also where your inner monologue becomes incredibly unkind.
Zone 5: Arctic Summit (5,000 – 5,895m)
Also known as: “The Roof of Africa, and the place where you question your life choices.”
Welcome to the top. The air is thin, the wind cuts like a knife, and you’ll probably feel a strange mix of euphoria, nausea, and “what the hell am I doing here?”
- Climate: Glacial. Bone chilling cold, high winds, and zero shade.
- Conditions: Thin air, snow underfoot, and spectacular views if you’re lucky.
- Temperature: As low as minus 20°C before sunrise.
- What to wear: Every single layer you own. And then wish you brought more.
Despite the suffering, this is where it all comes together. You’ll be standing above the clouds, watching the sun rise over the African continent, wondering if you still have functioning toes. It’s magic. It’s madness. And you’ll never forget it.
Summary of Kilimanjaro’s Climate Zones
| Zone | Altitude (m) | Conditions |
|---|---|---|
| Cultivation | 800–1,800 | Warm, tropical, farmland |
| Rainforest | 1,800–2,800 | Humid, wet, muddy trails |
| Heath & Moorland | 2,800–4,000 | Cool, dry, otherworldly plants |
| Alpine Desert | 4,000–5,000 | Cold nights, hot sun, barren |
| Arctic Summit | 5,000–5,895 | Sub-zero temps, wind, altitude extremes |
In other words, Kilimanjaro is not one climate, it’s five. In seven days. That’s why you’ll need to pack everything from sun hats to thermal underwear and prepare for a mountain that changes its personality more than a toddler on sugar.


Kilimanjaro Routes Explained: The Good, the Bad, and the Vomity
Picking a route up Kilimanjaro is like dating. You’ve got options. Some are fast and intense. Some are scenic and slow. Others are confusing and make you question your life choices. The right one depends on your budget, timeline, fitness, tolerance for other humans, and how much you enjoy prolonged uphill suffering.
There are seven main routes to Uhuru Peak, each with its own quirks. Below is the full breakdown painfully honest, mildly offensive, and completely useful.
Machame Route
Length: 6–7 days
Success Rate: High (85–90%)
Nickname: The Whiskey Route (as in strong, not smooth)
Starts: South side of Kilimanjaro
Sleeps: Camping only
The Vibe:
Machame is the most popular route and with good reason. It’s scenic, relatively affordable, has a decent acclimatization profile, and the daily distances are manageable if you’ve got some hiking legs on you.
You’ll pass through rainforest, moorland, volcanic ridgelines, alpine desert, and ice capped summit. It’s basically a crash course in geography… while gasping for breath.
Pros:
- Great acclimatisation profile with built in “climb high, sleep low” days
- Very scenic
- Solid success rate
- Our go to route for Soul Adventures groups
Cons:
- Busy in peak season (get ready to play “guess that snoring” at camp)
- Steep sections especially the Barranco Wall, which will humble you fast
- Camping only no hut option
Who it’s for:
Adventurous hikers who don’t mind a few crowds and want a solid all-rounder.
Marangu Rout
Length: 5–6 days
Success Rate: Low to Medium (50–60%)
Nickname: The Coca-Cola Route
Starts: Southeast side
Sleeps: Huts (yes, actual buildings)
The Vibe:
Marangu is the OG route, the only one with dorm style huts instead of tents. It sounds great until you realise it’s also the most overused, has poor acclimatisation, and you walk up and down the same path. Also, the summit attempt starts at midnight and lasts forever.
Pros:
- No tents, you sleep in huts
- Slightly cheaper overall
- Less gear to carry (no sleeping bags/tents)
Cons:
- No acclimatisation advantage, lots of people turn around early
- Same route up and down (aka Groundhog Day in hiking boots)
- Noisy huts filled with other people’s snoring and regret
Who it’s for:
First-timers who want a bed, don’t mind a lower summit chance, and think rainforests are best viewed from a bunk bed.
Lemosho Route
Length: 7–8 days
Success Rate: Very High (90–95%)
Starts: West side of Kilimanjaro
Sleeps: Camping
The Vibe:
Lemosho is the introvert’s dream route, remote, quiet, and scenic. It joins up with Machame on Day 3 but gives you a better acclimatization period. The longer duration means fewer altitude headaches and more moments to soak up the absurdity of what you’re doing.
Pros:
- Best scenery, hands down
- Longer = better acclimatization = higher success rate
- Less crowded for the first few days
- Diverse ecosystems and excellent photo ops
Cons:
- Slightly more expensive (due to more days and transport to trailhead)
- Still joins the busy Machame route halfway through
Who it’s for:
Photographers, romantics, overthinkers, and anyone who wants to ease into the madness.
Rongai Route
Length: 6–7 days
Success Rate: Medium to High (85%)
Starts: North side (near Kenyan border)
Sleeps: Camping
The Vibe:
Rongai is the dry-side approach perfect if you’re climbing in the rainy season (or just really hate mud). It’s less scenic at the start, but it’s peaceful, quiet, and has a gentle gradient. Bonus: this is where you’re most likely to see wildlife, like colobus monkeys or, if you’re lucky, a disgruntled buffalo.
Pros:
- Low rainfall = dry trails
- Quiet, peaceful route
- Excellent for off-season climbs
- Gradual slopes
Cons:
- Less scenic compared to Machame or Lemosho
- Poor acclimatization unless you stretch it to 7 days
- Ends on the Marangu route, which feels like switching from gourmet to gas station food
Who it’s for:
Rain-averse hikers and introverts who want to avoid crowds and puddles.
Northern Circuit
Length: 9–10 days
Success Rate: Insanely High (95%+)
Starts: West side
Sleeps: Camping
The Vibe:
The Northern Circuit is the unicorn of Kilimanjaro routes, long, stunning, and so well acclimatised that your red blood cells throw a party. It’s the longest option, circling the mountain’s northern slopes and offering summit chances with far fewer people in your way.
Pros:
- Best acclimatization of all routes
- Lowest traffic, you might go a full day without seeing another group
- Varied scenery, especially on the north side
- Ridiculously high success rate
Cons:
- Time-consuming (need at least 9–10 days)
- Expensive
- You’ll be ready to burn your hiking boots by day 10
Who it’s for:
Serious hikers, people with flexible schedules, and those who want to summit without an audience.
Umbwe Route
Length: 5–6 days
Success Rate: Low (50–60%)
Nickname: The Brutal Express
Starts: South side
Sleeps: Camping
The Vibe:
Umbwe doesn’t mess around. It’s steep, relentless, and has next to no time for acclimatization. The trail gains elevation faster than you can say “I’m not ready,” which is why it’s often used by experienced mountaineers or people training for Everest who hate their own knees.
Pros:
- Very direct and fast
- Quiet and scenic
- Great for hardcore types and altitude veterans
Cons:
- Poor acclimatization profile
- Tough on the legs
- Best reserved for the masochists or pros
Who it’s for:
Sadists, high-altitude junkies, and people who think Machame is “too mainstream.”
Shira Route
Length: 7–8 days
Success Rate: Medium
Starts: West (similar to Lemosho)
Sleeps: Camping
The Vibe:
Shira is a lot like Lemosho, but it cheats by starting way too high around 3,500m. That’s like starting a marathon at kilometre 30 and wondering why your lungs are on fire.
Pros:
- Scenic western approach
- Similar to Lemosho in later stages
- Decent acclimatization if done slowly
Cons:
- Starts too high, many climbers feel sick on Day 1
- You miss the rainforest zone
- Why do this when Lemosho exists?
Who it’s for:
People who like altitude roulette and hate warm-up hikes.
Route Comparison Table
| Route | Duration | Acclimatization | Scenery | Crowds | Sleep Type | Success Rate |
|---|---|---|---|---|---|---|
| Machame | 6–7 days | Very good | Excellent | High | Camping | 85–90% |
| Marangu | 5–6 days | Poor | Average | Medium | Huts | 50–60% |
| Lemosho | 7–8 days | Excellent | Outstanding | Low–Medium | Camping | 90–95% |
| Rongai | 6–7 days | Good | Moderate | Low | Camping | 85% |
| Northern Circ. | 9–10 days | Excellent | Excellent | Very Low | Camping | 95%+ |
| Umbwe | 5–6 days | Poor | Good | Very Low | Camping | 50–60% |
| Shira | 7–8 days | Average | Very Good | Low | Camping | 70–80% |
Summary:
- Want scenery and success? Go Lemosho or Northern Circuit.
- Want crowds and comfort? Machame or Marangu.
- Want to suffer quickly and silently? Umbwe.
- Want to look cool but secretly panic at 3,500m? Shira.
Still not sure? That’s what we’re here for. At Soul Adventures, we primarily recommend the Machame Route for its balance of scenery, success rate, and glorious summit stories but we’ll match you to the right one based on your personality and pain threshold.


Altitude: It’s Not You, It’s the Air (But Mostly It’s You)
Climbing Kilimanjaro isn’t just about strong legs and Instagram captions. The real enemy is altitude. Specifically, the total lack of oxygen and how your body reacts when it’s deprived of the sweet, breathable goodness you take for granted at sea level.
Welcome to the not so glamorous world of high altitude trekking, where you can be insanely fit and still find yourself puffing like a 90 year old chain smoker after tying your shoelaces.
What Is High Altitude?
In basic terms: the higher you go, the less oxygen is available in the air. At sea level, oxygen makes up about 21% of the air. At the summit of Kilimanjaro (5,895m), it drops to around 49% of what your lungs are used to. That’s not just “a bit less air.” That’s nearly half.
As a result, your body starts throwing a tantrum. You breathe faster, your heart works harder, and your body goes into survival mode. Which brings us to…
AMS: Acute Mountain Sickness
Also known as: The annoying cousin that shows up uninvited halfway through your hike.
AMS is the most common form of altitude sickness and affects around 75% of people who go above 3,000 metres including those who once ran an ultra-marathon and insist on telling everyone about it.
Symptoms:
- Headache (the kind that makes you regret being born)
- Nausea or vomiting
- Dizziness or light headedness
- Fatigue
- Loss of appetite
- Trouble sleeping
- The overwhelming urge to punch altitude in the face
It usually kicks in between 3,000 and 4,000 metres, conveniently around the time you’re too far from help but not close enough to feel proud.
How to Deal:
- Rest and don’t ascend further until symptoms improve
- Drink water like your life depends on it (because it kind of does)
- Use medication like Diamox (under guidance)
- Go pole pole, slowly, like a sloth with a hangover
- Tell your ego to take a hike and let your body adjust
Left untreated or ignored, AMS can escalate into far more serious conditions. Speaking of which…
HAPE: High-Altitude Pulmonary Edema
Also known as: Your lungs filling with fluid, which is exactly as bad as it sounds.
What is it?
Fluid builds up in the lungs due to low oxygen pressure, making it hard to breathe even when you’re resting. It’s sneaky, dangerous, and one of the top killers at high altitude.
Symptoms:
- Shortness of breath even while sitting still
- Persistent dry cough (sometimes with pink froth, not cute)
- Chest tightness or congestion
- Fast, shallow breathing
- Extreme fatigue
- Blue lips or fingernails (never a good look)
What to Do:
- Descend immediately. Like, now.
- Administer supplemental oxygen (we carry it on all Soul Adventures trips)
- Don’t try to tough it out. This isn’t a movie.
HAPE can develop rapidly even after a “good day” on the trail. You go from hero to helicopter case in a matter of hours if you don’t act fast.
HACE: High-Altitude Cerebral Edema
Also known as: Your brain swelling inside your skull because it’s mad at you.
HACE is rarer than AMS and HAPE, but it’s also the most terrifying. It usually develops from severe AMS and requires immediate evacuation.
Symptoms:
- Loss of coordination (can’t walk in a straight line)
- Confusion or disorientation
- Hallucinations
- Slurred speech
- Unconsciousness
- Being unable to answer the question “What mountain are you on?”
If someone starts acting strange, forgets where they are, or walks like they’ve had ten beers on an empty stomach, it’s HACE until proven otherwise.
What to Do:
- Descend as fast and as safely as possible
- Administer oxygen if available
- Dexamethasone (a steroid) may be given if prescribed in advance
- Don’t leave them alone
- Call in the cavalry (our guides are trained in high altitude first aid and rescue coordination)
Prevention: How to Not Be That Person on the Side of the Trail
Here’s how we keep your brain in your skull and your lungs relatively fluid-free:
- Choose a longer route: More days = better acclimatization = less drama
- Go slow: There is no prize for getting to camp first, except nausea
- Hydrate: 3–4 litres per day minimum (yes, you’ll pee a lot, that’s good)
- Eat: Even if you’re nauseous, keep nibbling
- Listen to your body: It’s not being dramatic it’s warning you
- Train at altitude: Like in the Drakensberg. Just saying.
- Climb high, sleep low: The golden rule of acclimatization
Why Soul Adventures Takes Altitude So Seriously
Every one of our guides is trained to recognise the early warning signs of altitude sickness. We carry:
- Pulse oximeters
- Oxygen bottles
- Emergency descent plans
- A healthy sense of panic prevention
We’ve had clients show mild symptoms of AMS and still go on to summit successfully because we caught it early and adjusted. We’ve also turned people around when needed because no summit is worth a body bag.
Bottom line: Altitude is the great equaliser. It doesn’t care how fit you are, how much your boots cost, or how many inspirational quotes you’ve read. Respect it, listen to your body, and let the mountain come to you.

How Fit Do You Actually Need to Be to Climb Kilimanjaro?
Ah, the eternal question: “Do I need to be super fit to climb Kilimanjaro?”
The short answer? No.
The longer, slightly passive aggressive answer? You don’t need to be an ultramarathon running, yoga loving, mountain goat of a human, but if the last time you walked further than your car to the fridge was during the Zuma presidency, we should probably talk.
Kilimanjaro is not a technical climb. There are no ropes, no crampons, no vertical ascents. But it is a physically and mentally demanding multi-day hike at high altitude. You’ll be walking between 5 and 10 hours per day, gaining serious elevation, dealing with temperature swings, and sleeping in a tent while your body adjusts to oxygen levels that would make a hamster wheeze.
The Real Challenge? Altitude, Not Fitness.
This surprises a lot of people.
You can be in the best shape of your life and still be knocked sideways by AMS at 4,000 metres. And you can be a casual weekend hiker who makes it to the summit without so much as a sniffle.
That said, being fit definitely helps:
- You recover faster after long trekking days
- Your muscles can handle the climbs without exploding into complaints
- You’re less likely to hate everything and everyone on summit night
So while altitude is the wildcard, fitness is your safety net.
What Kind of Fitness Helps?
Forget about how much you can bench press. This is hiking fitness we’re talking about.
1. Endurance
The most important factor. You’ll be hiking up and down hills for hours each day, often with a pack on your back. You need to be able to go the distance, slowly, and still have some fuel left at the end of the day.
2. Leg Strength
Your legs are going to hate you. Do them a favour by building strength through:
- Stair climbing
- Lunges
- Hill walking
- Weighted hikes
And yes, those last 200 metres to the summit at 5,800m will feel like doing squats underwater while being punched in the lungs.
3. Cardiovascular Fitness
A strong heart = better oxygen delivery = slightly less suffering.
Build it through:
- Hiking
- Running
- Cycling
- Fast walking with a backpack while muttering “why am I doing this?”
4. Core and Balance
You don’t need abs, but good posture and core strength help with pack carrying and uneven terrain. Also, you’ll feel like less of a jellybean when you trip on rocks for the hundredth time.
A Sample Training Plan (8–12 Weeks Out)
Weeks 1–4
- 3 cardio sessions per week (30–60 minutes each)
- 2 strength sessions (bodyweight or weights focusing on legs/core)
- 1 long weekend hike (start with 2–3 hours)
Weeks 5–8
- 4 cardio sessions (increase to 45–75 minutes)
- 2 strength sessions
- 1 long hike (4–6 hours, with elevation gain and a loaded pack)
Weeks 9–12
- 4–5 training sessions per week (mix of cardio and strength)
- 1–2 long hikes with a weighted pack (5–8 hours)
- Practice walking slowly, seriously, slow is the secret
Add in stretching, hydration, and the mental stamina to say “this is fine” when your body is screaming otherwise.
The Mental Game
Let’s not pretend this is all about muscles. Mental toughness is just as important, maybe more so.
You’ll be cold, tired, smelly, and possibly nauseous. You’ll question your life decisions. You’ll have a summit night that starts at midnight, climbs 1,200 vertical metres, and tests every molecule of willpower you have.
Your mindset can carry you when your legs feel done. Train it like you train your body.
A Word on Overtraining
Don’t get carried away and train like you’re going for Olympic gold. Too much training = fatigue, injuries, and burnout.
Aim for consistent, realistic preparation over several months. And include recovery days, because being injured before a big climb is about as useful as a down jacket in the sauna.
Drakensberg Training Hikes (Our Secret Weapon)
At Soul Adventures, we strongly recommend (and offer) guided prep hikes in the Drakensberg. These aren’t just “nice practice hikes” they’re brutally brilliant training that mimics Kilimanjaro’s altitude, terrain, and tantrums.
Try these:
- Tugela Falls Overnight Hike (3,000m+ altitude)
- Mnweni Circuit (over 2,000m of vertical gain)
- Drakensberg Grand Traverse sections (because why not suffer early?)
These hikes teach you:
- How your body handles long elevation gain
- How to manage gear and pack weight
- How to curse effectively and with variety
Bottom line:
You don’t need to be a triathlete. But you do need to be prepared physically and mentally. With the right training plan, a bit of grit, and possibly some tears on summit night, you’ll be more than ready to take on Africa’s greatest mountain.
Toilets on Kilimanjaro: Let’s Talk About the Real Summit Struggle
You’ve read about the glaciers. You’ve seen the sunrise summit shots. You’ve imagined the triumphant photo at Uhuru Peak. What you haven’t prepared for is squatting in a dark, wooden shack while 50km/h winds try to rob you of your dignity.
Welcome to the real struggle on Kilimanjaro, using the bathroom at altitude.
This section might not be glamorous, but it’s the one you’ll thank us for later.
The Types of Toilets You’ll Encounter on Kili
1. Public Long-Drop Toilets (a.k.a. “The Horror Huts”)
Found at campsites and select lunch stops, these are permanent structures built to contain… well, everything that’s come before you.
Features:
- A hole in the floor
- A door that may or may not close
- A smell that could peel paint off a Land Cruiser
- Footprints in places that defy physics
Technique required: precision, patience, strong thigh muscles, and the ability to hold your breath for up to 45 seconds.
2. Portable Toilets (a.k.a. “The Throne of the Wise”)
If you book with a reputable operator (like us), you’ll have the luxury of a portable chemical toilet in its own private tent. It’s not five star, but it is ten times better than the long drops.
Features:
- Cleaned daily by the support crew (bless them)
- Sits at a comfortable height, no quads required
- Actually has a seat, which feels like a miracle after a long day of hiking
Pro tip: Portable toilets are often shared between group members, so maybe don’t eat beans every day.
3. Bush Toilets (a.k.a. “Pick a Rock, Any Rock”)
On the trail between camps, when nature calls and there’s no toilet in sight, you’ll need to get creative.
Technique:
- Walk at least 30 metres off the trail
- Dig a small hole (or at least try)
- Do the deed
- Pack out all toilet paper (yes, really)
- Try to pretend the person ahead of you didn’t just do the same thing
You’ll develop a new appreciation for the simple joy of privacy.
Peeing at Night: A Dark and Chilly Odyssey
You will pee a lot on Kilimanjaro. It’s the price you pay for staying hydrated at altitude. And unfortunately, nature doesn’t care that it’s midnight and minus 10 outside.
Your options:
- Hold it: Until your bladder starts writing angry emails to your brain.
- Crawl outside: Battle with your sleeping bag, put on shoes, unzip three layers of tent, and stumble into the icy darkness.
- Use a pee bottle: Game changer. Just make sure it’s clearly labelled. We’re not kidding.
Ladies: A she-wee or similar pee funnel will save your sanity. Practice before the trip. Trust us.
Hygiene at Altitude: The Uphill Battle
- There are no showers. None. You will smell like effort.
- Wet wipes are your best friend. Bring a big pack. Maybe two.
- Hand sanitiser is a non-negotiable. Use it religiously. Before meals. After toilet visits. After accidentally touching anything near a long-drop.
Waste Management and the Leave No Trace Ethos
At Soul Adventures, we follow Leave No Trace principles. That means:
- Human waste goes in designated toilets or is packed out where required
- All toilet paper is either buried (properly) or packed out
- No “bush confetti”, nothing ruins a trail more than toilet paper snowdrifts
We’re committed to keeping the mountain clean and expect you to be too.
What to Pack for the Bathroom Situation
- Wet wipes (alcohol free, biodegradable if possible)
- Toilet paper (don’t rely on the crew for this)
- Hand sanitiser (small bottles in multiple pockets)
- Ziplock bags (for used toilet paper)
- Pee bottle (wide mouth, leak proof)
- Pee funnel (for the ladies, and practice makes perfect)
- Small trowel (optional, but handy for trail toilet emergencies)
Final Words on the Matter
Nobody climbs Kilimanjaro for the toilets. But how you handle them might just define your overall experience. With a bit of prep and the right attitude, you’ll be flushing your dignity down the long drop like a pro in no time.


Your Porter Team: Why You’re Basically Royalty (and Why It Matters)
Let’s address the awkward truth no one wants to admit on Instagram: you didn’t climb Kilimanjaro alone.
Sure, you put in the work. You trained. You walked. You suffered. You cried quietly into your soup at 4,700 metres. But the real heroes of Kilimanjaro? They’re the people you don’t always see in summit photos, your porters, cooks, and crew.
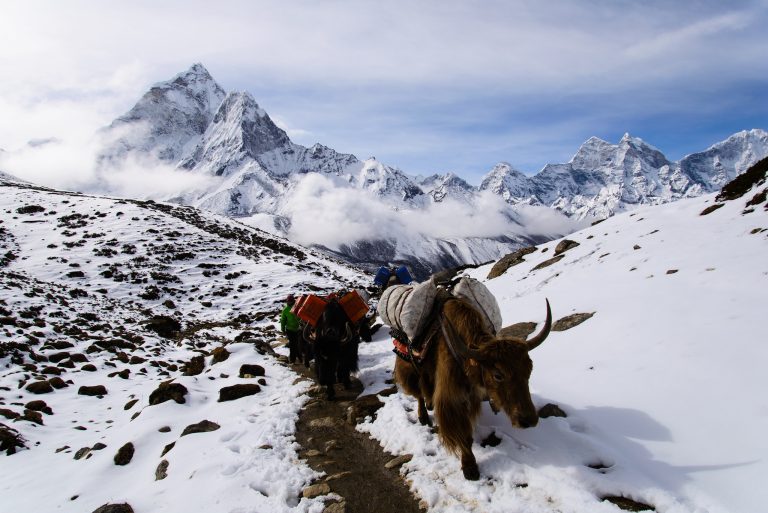
These absolute machines carry the tents, the gear, the food, the gas, the tables, the chemical toilet (yes, that too), and in some cases, fellow hikers who’ve hit the proverbial altitude wall. And they do it with a smile, a joke, and sometimes in Crocs.
What Do Porters Actually Do?
Short answer: everything that makes your climb possible.
Long answer:
- Carry your main duffel bag (usually up to 15kg)
- Set up and take down camp every day
- Fetch and boil drinking water
- Help in the kitchen
- Sometimes even wake you up with hot tea
- Cheer you on when you’re crying into your trekking poles on summit night
Most teams include:
- Porters (1 to 3 per client, depending on gear)
- Cooks (the unsung heroes of morale)
- Waiters/servers (yes, on a mountain)
- Guides and assistant guides (your navigators and altitude monitors)
- Toilet crew (give these people a raise, they deal with your consequences)
A Day in the Life of a Porter
While you’re casually sipping tea in your tent and contemplating the effort of putting socks on, here’s what your porter has probably done before 7am:
- Taken down your tent
- Packed your gear
- Strapped 20kg of kit to their back
- Left camp well before you
- Arrived at the next camp to set it up again before you get there
All this while walking the same trail as you, only faster, and with a smile. Sometimes singing. Sometimes dancing. Sometimes offering you a hand over that rock you’ve been glaring at for 15 minutes.
The Dark Side: Porter Abuse on Kilimanjaro
Unfortunately, not all companies treat porters with the respect and care they deserve. You’ll hear horror stories of:
- Porters sleeping without proper tents or sleeping bags
- Being underpaid or not paid at all
- Carrying more than the legal weight limit
- Going without food or water
- Wearing second-hand sandals at 4,000 metres
It’s exploitative, unethical, and unnecessary and it’s one of the reasons why you should choose your trekking company wisely.
Enter KPAP: The Kilimanjaro Porters Assistance Project
KPAP is the organisation working to protect porters’ rights. They:
- Enforce fair wages
- Monitor porter treatment
- Promote gear lending and weight limits
- Inspect companies and certify those that meet ethical standards
Any company that’s KPAP-affiliated is doing things properly. Full stop.
We only work with KPAP-partner crews. If the people helping you summit Africa’s highest peak aren’t being treated ethically, then your trip isn’t a success, no matter how great your photos are.
The Tipping Situation: Yes, You Have to Do It
Porters and crew are paid a basic wage but tipping is a standard part of the Kilimanjaro economy. It’s expected, it’s deserved, and frankly, it’s the least you can do for someone who carried your tent, your food, your ego, and maybe even you when you couldn’t go another step.
Suggested tipping breakdown per trekker (in USD):
- Lead guide: $20–30 per day
- Assistant guide: $15–25 per day
- Cook: $10–15 per day
- Porters: $8–10 per day per porter (you’ll usually have 2–3)
On a 7 day climb, your total tip budget could come to around $200–300, more if you’re feeling generous.
How to tip properly:
- Give tips on the final day before departure
- Put it in envelopes or hand it to the lead guide to distribute fairly
- If possible, tip in Tanzanian shillings or clean USD notes
Want to go the extra mile? Bring old boots, warm gear, or backpacks you no longer need, many porters survive on donated hand me downs.
What Soul Adventures Does Differently
We don’t just talk ethics, we walk the walk (and pay the porters who carry our walk).
With our team, you can expect:
- Fair pay and proper gear for all crew
- Strict weight limits for porter loads
- Meals and accommodation that match client conditions
- Support, smiles, and the occasional dance party all deserved
We’ve climbed with some of these legends for years. They’re not just staff. They’re family. And they’re the reason we reach the summit, again and again.
Bottom line: You’re only as strong as the team behind you. So tip well, say thank you, and never forget who made your summit possible and carried your wet wipes while doing it.
Training Hikes in the Drakensberg (Because That’s Where Legends Are Made)
Let’s be honest, you can train for Kilimanjaro on your local treadmill, or you can train in the Drakensberg, where your tears freeze at altitude, baboons judge your snack choices, and you occasionally have to crawl up passes that feel like a stairmaster designed by a sadist.
If Kilimanjaro is the final boss, the Drakensberg is the training montage.
And no one does high altitude prep in South Africa quite like we do.
Why Train in the Drakensberg?
Because it’s real world hiking. With real rocks. Real altitude. Real weather. Real reasons to curse your boots.
The Drakensberg gives you:
- Elevation gain that simulates summit days on Kili
- Altitude exposure up to 3,300m
- Rough, technical terrain that strengthens ankles, knees, and character
- Multi-day trekking experience in tents, just like on the mountain
- Mental training for summit night misery (in a good way)
Plus, it’s closer to home, cheaper than flying to the Himalayas, and if you pass out, you’re still in South Africa where your medical aid might actually cover the rescue.
Recommended Kilimanjaro Prep Hikes in the Berg
1. Tugela Falls Overnight Hike
- Altitude: 3,000m+
- Duration: 2 days
- What it’s good for: Cold weather camping, exposure to high elevation, and getting friendly with chain ladders
- Bonus: You get to sleep on the Amphitheatre, one of the most dramatic cliffs in the world
Training benefits:
- Mimics sleeping at Kili’s higher camps
- Tests your gear and layering
- Forces you to pee in the middle of the night while freezing
2. Mnweni Circuit (3 Days)
- Altitude: Up to 3,150m
- Vertical gain: Brutal
- Distance: Around 38–45km, depending on your route
- What it’s good for: Seeing if your legs actually like hiking uphill for 7 hours straight
Training benefits:
- You carry all your own gear (builds mental and physical toughness)
- Navigates steep, uneven terrain
- High daily mileage builds stamina
- You’ll learn how to cry gracefully in front of others
3. Cathedral Peak Hike (2 Days)
- Altitude: 3,004m
- What it’s good for: Testing your cardio on a straight up summit mission
Training benefits:
- High heart rate, big views, and no room for ego
- Sharpens your balance and scrambling skills
- Teaches you how to breathe with your hands on your knees
4. Mini Drakensberg Traverse (5–6 Days)
- Altitude: Varies, up to 3,200m
- Distance: ±80km
- What it’s good for: A full simulation of Kili minus the porters ( available on request )
Training benefits:
- Multi day endurance
- Back to back camp setups
- Real test of layering, blister prevention, and snack discipline
- Builds the confidence you’ll need for summit night
The Soul Adventures Advantage
All our Drakensberg hikes are:
- Fully guided (by legends who’ve also summited Kili, Everest Base Camp, and more)
- Properly catered (because you can’t train without eating like a hiker god)
- Designed to simulate Kilimanjaro’s demands physically, logistically, and emotionally
- Weather flexible we hike in wind, cold, drizzle, and the occasional frosty existential crisis
Need help picking the right hike for your level? We’ll match you up, gear you up, and toughen you up.
Bonus: Gear Testing Ground
The Drakensberg isn’t just for building lung capacity, it’s where you:
- Break in your boots (before they break you)
- Test your layering system (spoiler: cotton is the devil)
- Learn what snacks survive a sweaty backpack
- Discover that “4 season sleeping bag” might actually mean “frozen shoulder burrito” at 3am
You’ll know exactly what works and what doesn’t before you land in Tanzania.
Bottom line:
You don’t just hike Kilimanjaro you train for it. And there’s no better way to do that than getting uncomfortable in the Drakensberg with us shouting encouragement (and mild insults) as you conquer your limits.

What Gear Do You Need to Climb Kilimanjaro (And What You’ll Cry Into)
You’ve probably already Googled “Kilimanjaro gear list” and ended up with enough spreadsheets to rival a NASA launch. Every blog has its own version. Some tell you to bring two base layers, others suggest a full expedition-grade snowsuit and a solar-powered cappuccino machine.
We’re going to cut through the nonsense and give it to you straight: you don’t need to look like a sponsored athlete, but you do need to be warm, dry, and reasonably coordinated.
Let’s break it down. No fluff. No frills. Just the stuff you’ll actually use and the stuff that’ll save your summit.
The Golden Rule: Layer Like an Onion
You’re going through five climate zones. Your gear needs to adapt as fast as Kilimanjaro’s weather changes which is to say, very fast.
Here’s the system:
1. Base Layer (x2 sets)
- Thermal top and bottom
- Wicks sweat, keeps warmth in
- Merino wool or synthetic, no cotton (unless you enjoy damp misery)
2. Mid Layer
- Fleece or softshell jacket
- Acts as your main insulating layer
- Optional fleece pants for colder nights
3. Insulation Layer
- Down or synthetic puffer jacket
- Must be warm enough to survive summit night
- Think “cosy igloo vibes,” not “budget fashion fleece”
4. Outer Layer (Shell)
- Waterproof jacket (Gore-Tex or similar)
- Waterproof pants
- Must be breathable and windproof
- Your protection when the mountain throws a tantrum
On the Bottom Half
- Hiking pants (1–2 pairs)
- Thermal leggings (base layer)
- Waterproof overpants (you’ll thank us later)
- Shorts (optional but beware: sunburnt thighs are no joke)
Footwear
This can make or break your trip.
- Hiking boots: Well worn in, ankle support, waterproof
- Camp shoes: Crocs, slides, or trail runners, anything you can slip on and off
- Thick hiking socks (x4–5 pairs): Wool or synthetic
- Liner socks (optional): Helps prevent blisters
- Gaiters (optional): Keeps mud, dust, and snow out
Head & Hands
- Wool or fleece beanie
- Neck buff or balaclava
- Sun hat with brim
- Gloves: One light pair, one warm waterproof pair for summit night
- Sunglasses: High UV protection, especially for summit day glare
Sleeping
- 4 season sleeping bag (comfort rated to at least -10°C)
- Sleeping bag liner (adds warmth and protects your bag)
- Inflatable pillow (or stuff your down jacket into a dry bag and suffer slightly less)
The Daypack (Your Lifeline)
- Size: 25–35 litres
- Needs to carry water, layers, snacks, camera, and existential dread
- Should have a hip belt and sit snugly, this thing becomes your companion
In Your Daypack, Carry:
- Rain jacket
- Warm layer
- Snacks
- 3 litres of water
- Sunscreen & lip balm
- Tissues or toilet paper
- Headlamp
- Buff or neck warmer
- Gloves
- Basic first aid items
- Power bank (because your phone will freeze and die)
The Duffel Bag (Your Porter Carries This)
- Max 15kg (strict limit)
- Waterproof or with a rain cover
- Use packing cubes or dry bags to organise
Porters are not pack mules. Respect the weight limit. If you want to bring your guitar, be prepared to carry it yourself.
Other Essentials
- Water bottles or hydration bladder (bladders may freeze on summit day, use bottles)
- Insulated bottle cover for summit day
- Trekking poles (absolute game changers, save your knees)
- Headlamp (summit night begins in darkness and possibly despair)
- Power bank (solar optional)
- First aid kit (plasters, painkillers, altitude meds, blister tape, personal meds)
- Snacks (see Section 7: Food, you know the drill)
- Toiletries: Toothbrush, biodegradable soap, wet wipes, moisturiser
- Quick-dry towel
- Plastic bags or dry sacks for dirty clothes
- Pee bottle (you’ll understand when the time comes)
Gear Mistakes We See Too Often
- New boots. Breaking in boots on Kili = blister roulette
- Cotton anything. It gets wet and stays wet
- Too much gear. You don’t need five jackets. You’re climbing a mountain, not doing a photoshoot
- No waterproof layers. The mountain always wins
- Borrowed gear that doesn’t fit. Your cousin’s old ski jacket isn’t going to cut it
Renting vs Buying
Don’t want to buy everything? That’s fair. You can rent most major items in Moshi or Arusha:
- Sleeping bags
- Jackets
- Poles
- Gaiters
- Duffel bags
BUT rental gear is a gamble. You don’t know what condition it’ll be in until you’re already committed. If you do rent, do it through us or a trusted partner. And always test it before you’re halfway to Shira Camp and realising your zip doesn’t close.
How Soul Adventures Helps You Gear Up
We’re not just throwing you at the mountain with a vague checklist and a “good luck.”
Here’s what we offer:
- Full gear checklists tailored to your route and season
- Pre departure Q&As
- Access to 10% off at Drifters outdoor store
- Gear rental guidance and backup gear if needed
- Packing tutorials before the trip
- Brutally honest feedback if your puffer jacket looks more “fashion” than “function”
Bottom line: The right gear won’t make the climb easier but the wrong gear will definitely make it harder. Invest wisely, test it all in advance, and remember: it’s better to look slightly ridiculous and be warm than to look cool and freeze on summit night.


The Logistics: Flights, Visas, Paperwork and What’s Actually Included
Climbing Kilimanjaro is a once in a lifetime experience. But before you can stand triumphantly on the Roof of Africa, you’ve got to get there, physically, legally, and emotionally.
This is your no BS briefing on how to get to Kilimanjaro, what’s included in your Soul Adventures package, and what bits you still need to sort out yourself. No fine print. No hidden clauses. Just straight answers.
Getting to Tanzania: Flights and Airports
Your international flight will land at one of the following:
1. Kilimanjaro International Airport (JRO)
- The closest airport to the mountain
- About 45 minutes from Moshi
- Most convenient option, this is the one we recommend
2. Julius Nyerere International Airport (DAR) – Dar es Salaam
- Cheaper flights, often with layovers
- Domestic connection to JRO required
- Adds time, stress, and extra transfers
3. Nairobi (Kenya) – Jomo Kenyatta International (NBO)
- Some people use Nairobi for better international flight options
- Requires a bus or internal flight to JRO
- More border control, more admin, more potential grey hairs
Pro tip: Fly directly to JRO if possible. Fewer moving parts = fewer things that can go wrong.
Transfers: How You Get From the Airport to the Mountain
With Soul Adventures, airport transfers are included in the package. That means:
- We’ll meet you at Kilimanjaro International Airport (JRO)
- You’ll be driven to your hotel in Moshi for a pre climb briefing
- At the end of the climb, we’ll take you back to the airport
- We do not leave you stranded, confused, or emotionally fragile at baggage claim
Visa Requirements
Unless you’re from one of Tanzania’s select visa-exempt countries, you’ll need a tourist visa.
South African Citizens:
- Currently visa-free for up to 90 days
- Just rock up with a passport, no paperwork
Most Other Countries (UK, USA, EU):
- Visa on arrival: $50 USD (single entry)
- Or apply online in advance at Tanzania’s official e-visa portal
Passport validity: Minimum 6 months from date of entry, with at least two blank pages.
Vaccinations and Health Requirements
As of now:
- Yellow Fever certificate may be required if travelling via a yellow fever country (like Kenya)
- COVID-19 rules may change, but as of this writing, most restrictions have been dropped
- Recommended vaccines: Hep A, Hep B, Typhoid, Tetanus
Check with a travel clinic at least 6 weeks before departure. It’s not just about ticking boxes, it’s about not getting something unpleasant from a suspicious salad.
What’s Included in Your Soul Adventures Package
We’re not fans of hidden costs or sneaky exclusions. So here’s exactly what you get when you book with us.
Included:
- Airport transfers in Tanzania
- Two nights’ hotel accommodation in Moshi (before and after the climb)
- All park entry and climbing permits
- Government taxes and conservation fees
- Professional, English-speaking guides (and a SA guide if group size ≥ 6)
- Porter and cook team (ethically employed)
- All meals on the mountain
- Tent and sleeping mat (we use proper expedition tents)
- Water (purified and safe to drink)
- Emergency oxygen and first aid equipment
- Group gear (tables, chairs, loo tents, etc.)
- Summit certificate (in case your Instagram post isn’t proof enough)
Not Included:
- International flights
- Tips for guides, porters, and crew
- Travel insurance (mandatory)
- Personal gear and clothing
- Extra hotel nights (if you want to extend your trip)
- Meals in town before/after the climb
- Alcohol and soft drinks
- Any personal medical expenses
- Emotional support after summit night
Travel Insurance (Yes, You Really Do Need It)
You’ll need a comprehensive policy that covers:
- High-altitude trekking up to 6,000 metres
- Emergency medical evacuation
- Trip cancellations or delays
- Lost baggage or gear
Don’t try to sneak up the mountain with a budget airline policy that only covers yoga retreats and mild inconvenience. We check this stuff. And we’ve seen it save lives.
Money Matters
- Tanzanian Shillings are the local currency, but USD is widely accepted for tipping and gear rental
- Bring clean, crisp USD bills, old, damaged notes often get rejected
- Credit cards may be accepted at larger hotels and gear shops, but cash is king in most places
- ATMs are available in Moshi, just don’t rely on them 100%
Pre-Climb Briefing
The night before your climb, we’ll do:
- Gear check
- Route briefing
- Q&A session
- Paperwork finalisation
- The first of many conversations about how much water you should be drinking
You’ll meet your crew, your fellow hikers, and your new family of sweaty, excited adventurers.
Post Climb Celebration
Once you’re back from the mountain and have rediscovered the joys of toilets and pillows, we’ll:
- Get you back to the hotel
- Clean you up
- Feed you
- Probably hand you a cold drink
- Hold a celebration dinner if you’re up for it
- Give you your summit certificate and possibly a few tears of joy
Bottom line: We’ve got the logistics sorted so you can focus on the climb. You bring the energy and maybe a backup charger, we’ll handle the rest.
Why Climb Kilimanjaro with Soul Adventures (Other Than Because We’re Hilarious)
There are hundreds of Kilimanjaro tour operators out there. Big names. Small names. Some that seem to operate exclusively out of a WhatsApp group. So why go with Soul Adventures?
Well, aside from our ability to crack a solid joke at 5,000 metres, there are a few not so small reasons why we’re the crew you want backing you when your face is freezing and your bladder is plotting against you.
1. You Don’t Just Climb, You Train with Us First
We’re not the “book it and see you in Tanzania” type. We’re with you before, during, and after the climb.
- Drakensberg prep hikes to test your gear, legs, and emotional fortitude
- Gear checks to avoid last minute disasters (looking at you, guy who brought denim)
- Fitness advice and altitude prep from guides who’ve summited dozens of times
- Packing tutorials that go beyond “bring layers” we actually show you what works
We treat this like a full expedition, not just a plug and play vacation.
2. South African Guide Joins the Trip (With 6 or More Climbers)
We send one of our certified Soul Adventures guides to climb with you if your group has six or more hikers. Why? Because we believe in:
- Familiar support from someone who’s trained with you
- Consistency in leadership from prep hikes to summit
- Having someone who gets your jokes and knows what biltong is
This isn’t a random outsourced climb. It’s your team, your vibe, and your journey.
3. Small Groups. Big Experience.
We cap our groups at 12 trekkers. That means:
- No chaotic mega-group logistics
- Personal attention from guides
- Less waiting around at campsites
- Strong group dynamic (and fewer snorers per tent row)
It also means we get to know you. Your strengths. Your weaknesses. Your trail snack preferences. The name of the stuffed frog you secretly sleep with. Everything.
4. We Partner With the Best Local Crews
Behind every successful Kilimanjaro climb is a local team of absolute legends. We only work with:
- KPAP-affiliated partners (see Section 9, porters matter)
- Experienced Tanzanian guides and cooks with years of Kili knowledge
- Porters treated with respect, proper gear, proper pay, and actual beds
- Crews who have your back when you’ve lost the will to go uphill
You climb ethically. That’s non negotiable.
5. Safety Is Not a Side Note
Summit fever is real. People push too far. Operators take risks to get that photo at Uhuru Peak.
Not us. We’d rather turn back with a healthy hiker than press on with a future rescue case.
We carry:
- Pulse oximeters to monitor blood oxygen daily
- Emergency oxygen (and people who know how to use it)
- First aid kits for blisters to busted knees
- Qualified guides trained in high altitude medical response
- Evacuation plans if things go sideways (and they occasionally do)
We don’t fear monger. But we also don’t pretend nothing can go wrong. It’s a mountain, not a mall.
6. Our Reputation? Solid. Our Feedback? Glowing.
Want to know how we roll? Don’t just ask us. Ask:
- The hikers who cried happy tears at the summit
- The ones who didn’t summit but said it was still the best trip of their life
- The clients who’ve climbed with us multiple times because once isn’t enough
- The porters who request to work on our trips because they know we do it right
You can scroll reviews. Or you can just join and see for yourself.
7. We’re Actually Fun (Even at 5,800m)
The mountain is serious business — but that doesn’t mean the experience has to feel like a corporate wellness seminar. We bring:
- Laughter
- Bad altitude jokes
- South African sarcasm
- Trail games
- Summit night motivation so ridiculous it somehow works
You’ll cry. You’ll sweat. You’ll possibly hallucinate. But you’ll never feel alone, and you’ll probably leave with new mates for life.
Bottom line:
You can climb with a company that treats you like a number. Or you can climb with Soul Adventures where we treat your trip like it’s the most important thing we’ll ever do.
Because to you, it is.


Things That Might Go Wrong (And How We Keep You Alive Anyway)
Let’s be clear: climbing Kilimanjaro is not a death defying mountaineering mission. Thousands of people summit it every year including grandmothers, teenagers, and people who packed four jars of Nutella “just in case.”
But it’s also not a joke. Altitude is real. Weather is unpredictable. Accidents can happen. And if you’re not with a properly trained crew, a small hiccup can turn into a full-blown emergency faster than you can say, “I thought this was just a hike.”
Luckily, you’re with us.
What Can Go Wrong on Kilimanjaro?
Let’s not sugar coat it. Here’s what could go wrong and how we deal with it.
1. Altitude Sickness
We’ve covered this in painful detail back in Section 5. Still, to recap:
- AMS is common and manageable
- HAPE and HACE are rare but serious
- Altitude is the biggest risk on Kili
Our solution:
- We monitor every client daily with a pulse oximeter
- We carry emergency oxygen
- Our guides are trained to spot symptoms before they escalate
- We build in proper acclimatization days
- We have zero summit pressure your health always comes first
2. Dehydration and Exhaustion
You’re walking 5–10 hours a day, sweating in the sun, and peeing every 30 minutes. It’s easy to underestimate how much water you need.
Our solution:
- Constant hydration reminders (yes, we will nag you)
- Safe, filtered and boiled drinking water provided daily
- Electrolyte advice and altitude snack hacks
- Encouraging frequent breaks (especially when your morale starts limping)
3. Falls, Sprains, and Blisters of Doom
The trail is rocky, uneven, dusty, muddy, and on summit night icy and steep. You might roll an ankle. You might get a blister so big it needs its own summit certificate.
Our solution:
- Trekking poles encouraged (and taught if you’re new to them)
- We carry a full first aid kit
- Guides trained in injury management and taping techniques
- We adjust the pace for injury support when needed
4. Bad Weather
Even in the dry season, Kilimanjaro sometimes decides to remind you that nature still runs the show.
Expect:
- Sudden storms
- Freezing summit temps
- Wind strong enough to blow your hat into another time zone
Our solution:
- We watch forecasts like hawks
- Our gear advice is tailored to handle bad weather days
- Extra gear available if you show up unprepared (don’t make us use it)
- Camps are selected for protection where possible
- Summit push is timed for safety not just glory
5. You Just Hit a Wall
Physical fatigue. Mental shutdown. Emotional “what the hell am I doing here” moments. Everyone has them usually around 4,500 metres when your brain starts planning a fake ankle injury.
Our solution:
- We walk slowly painfully slowly to protect your energy
- Guides offer encouragement, motivation, and well timed sarcasm
- You’re never alone, we stay by your side, especially on summit night
- Camp life is fun, supportive, and full of moments that remind you why you’re doing this in the first place
When the Worst Happens
We don’t play games with safety. If someone gets too sick, too injured, or too unstable to continue, we evacuate.
How evacuation works:
- If it’s urgent, we call for stretcher support from the rangers
- In extreme cases, we can coordinate helicopter evacuation
- Our team will never leave someone behind or push them beyond safe limits
- We also assist with hospital support and insurance paperwork if needed
We’ve handled:
- Evacuations from Barafu
- Rapid descents from Kibo Huts
- Mild frostbite (one hiker wore ankle socks on summit night… never again)
- Emotional breakdowns, dehydration collapses, gear failures, and tantrums
It’s not common, but it happens. And we’re prepared.
How You Can Help Us Keep You Safe
- Be honest about how you’re feeling don’t “tough it out”
- Follow instructions this isn’t a democracy at 5,000 metres
- Drink water even when you don’t feel thirsty
- Wear the right gear (Section 11 is not a suggestion, it’s survival prep)
- Tell us about medical conditions or medications in advance
We’d rather hear about your asthma in Moshi than discover it halfway up the Barranco Wall.
Bottom line:
Mountains are unpredictable. That’s part of the magic. But with the right team, the right training, and the right gear, Kilimanjaro becomes one of the safest high-altitude adventures you can take on.
And with Soul Adventures, you’ve got a team who’s been there, done that, and carried people back down when they had to without ever making them feel like they failed.